
How to Install CommitKeeper
Here are the steps to installing CommitKeeper into your Salesforce.com organization. This document takes you from the listing in the AppExchange to making CommitKeeper available to your teammates.
0. Profile Configuration
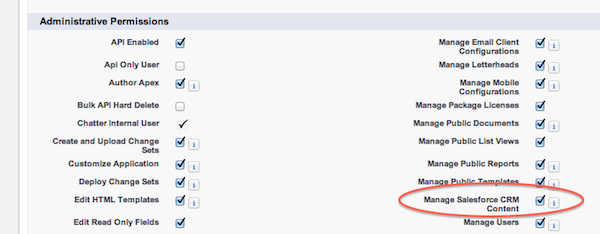
You must be a System Administrator to install CommitKeeper, and your user Profile should be named exactly “System Administrator” (or the equivalent in other languages). (For other Profile names, please contact support@4spires.com for a workaround.) Before installing CommitKeeper, in your Administrator profile, ensure that you have permission to manage CRM Content, as in the following screen:
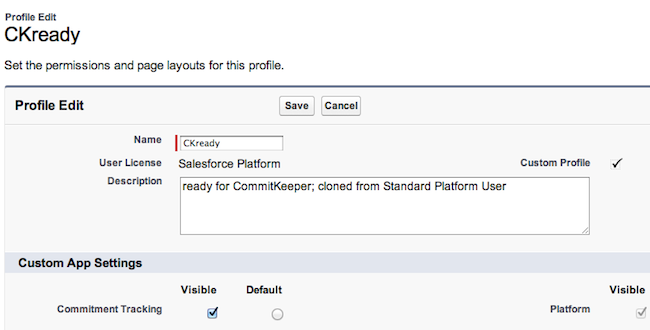
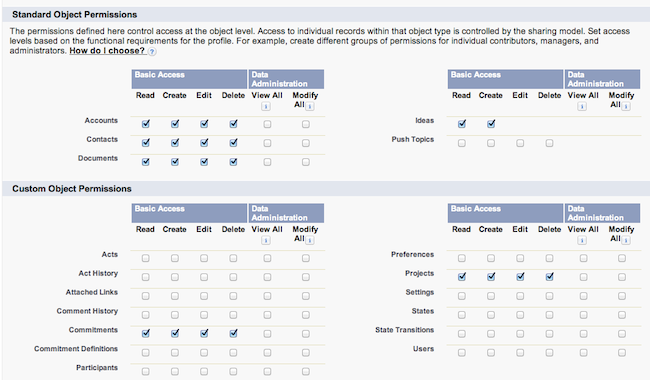
You must also have CRM Content licenses for everyone who will be using CommitKeeper. You may wish to create a custom profile for your CommitKeeper users. The following two screens show the profile settings in an Enterprise Edition org.
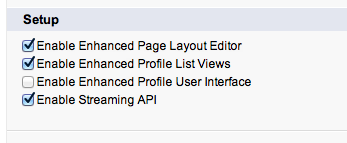
In organizations other than Professional Edition, if you are using the Enhanced Profile User Interface, we recommend temporarily turning that off. Go to <user name> / App Setup / Customize / User Interface and uncheck the Enable Enhanced Profile User Interface checkbox. Click Save.
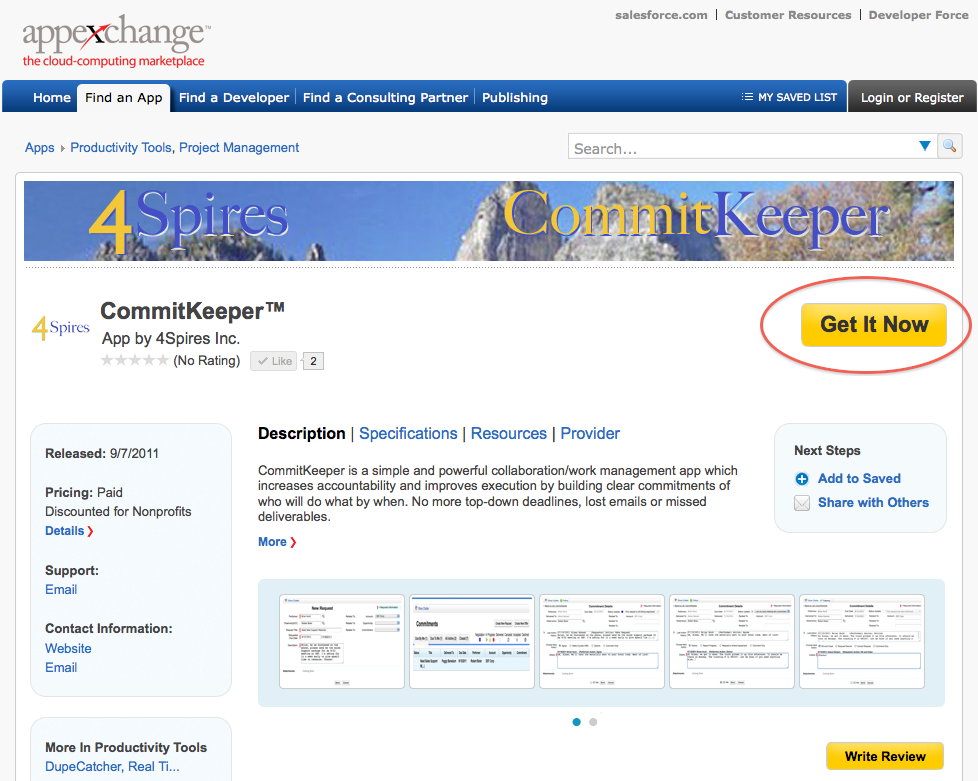
1. Visit the AppExchange
The CommitKeeper listing in the Salesforce AppExchange™ is presented here. Unless you’ve made other arrangements, the installation will be a free 30-day trial, and you can license up to 5 members of your organization during the trial period. After you have reviewed the product information, the first step in the trial installation is to click Get It Now.
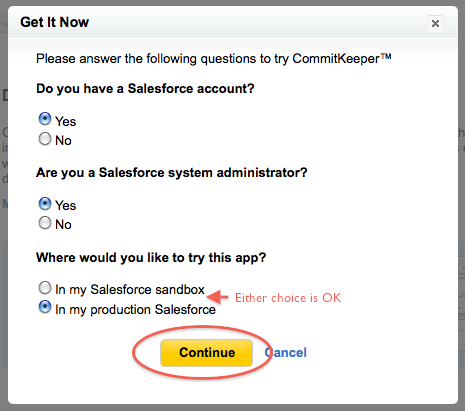
2. Answer three questions
Since you must be an administrator in your org to install CommitKeeper, Salesforce will ask you three questions, revealed one at a time. To proceed, you must answer the first two questions as follows:
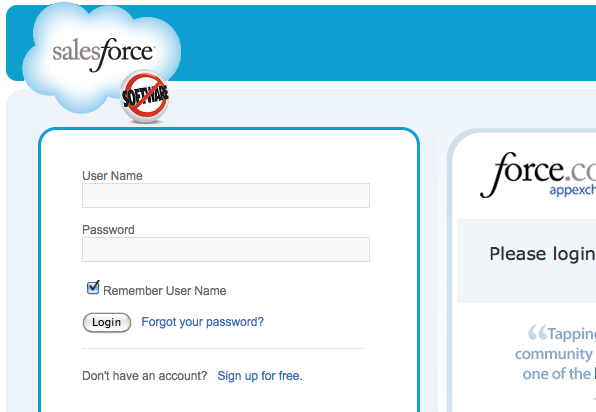
3. Enter your login ID and password
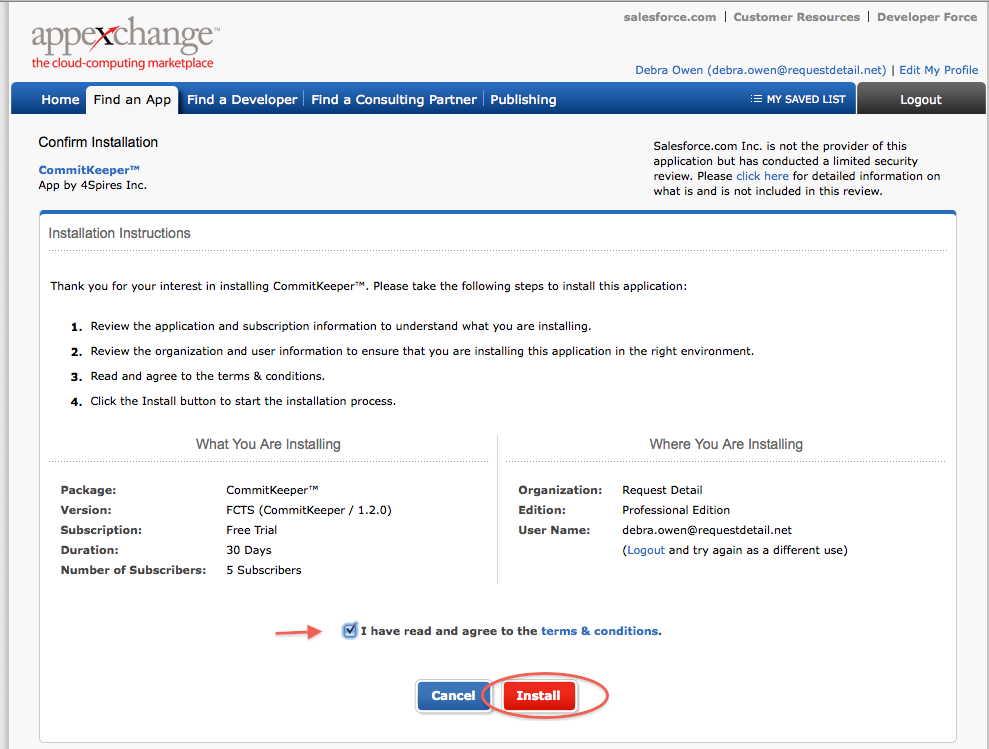
4. Confirm the installation
On the next screen, you will confirm that you are installing CommitKeeper and where you want Salesforce to put it.
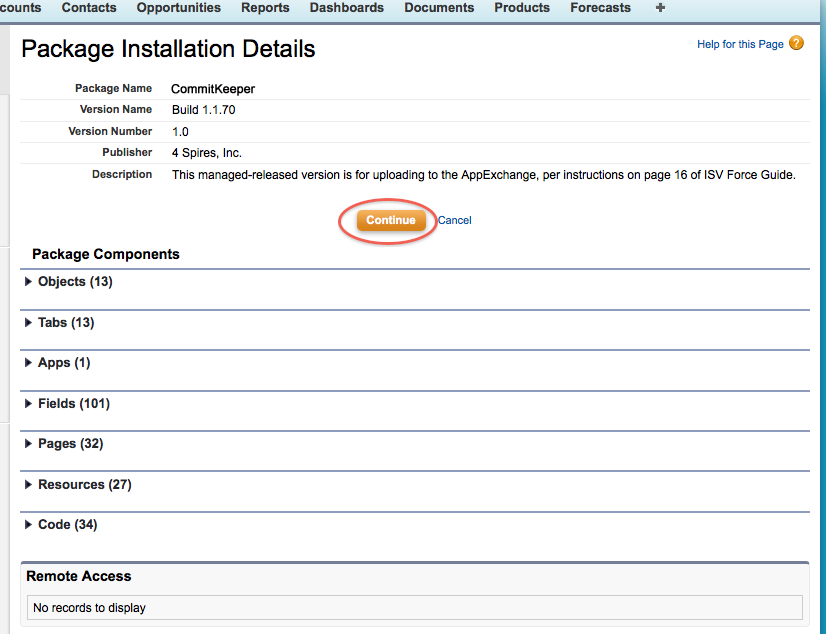
5. Review the components of the installation
Unless you wish to explore the contents of the package, simply click Continue.
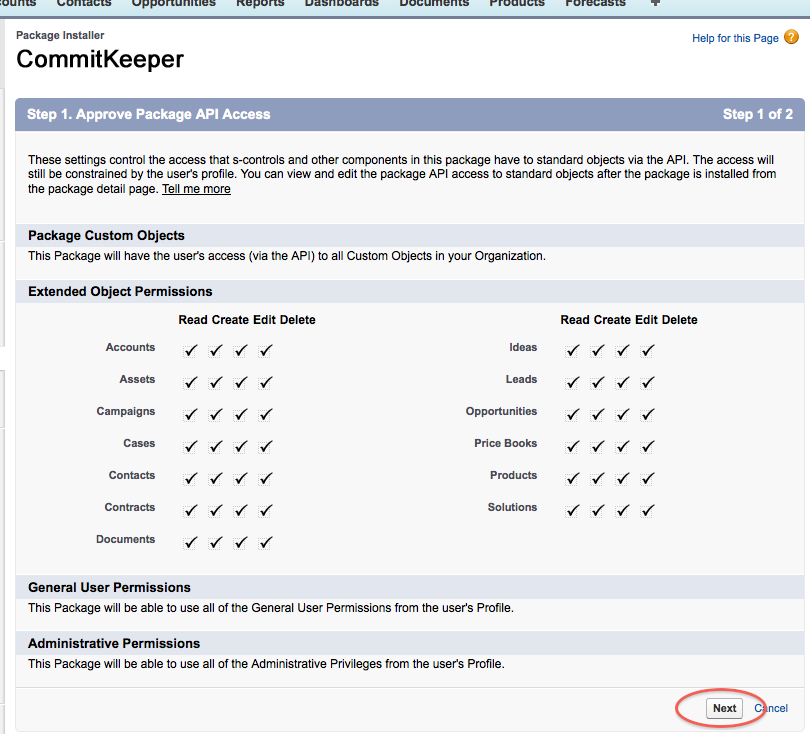
6. Granting CommitKeeper access via the Salesforce API
In order to do its job, CommitKeeper must have access to the objects associated with your users’ profiles. Since CommitKeeper is 100% native, this is done through the Salesforce API.
Click Next to grant that permission.
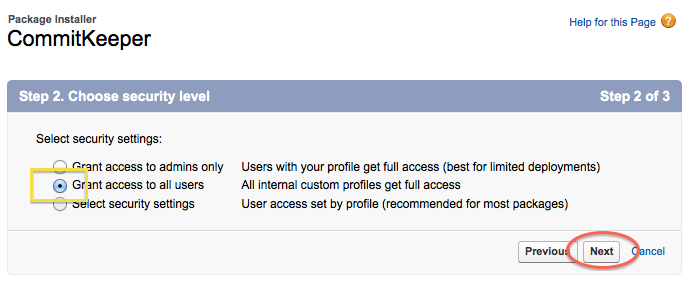
7. Select All Users
In this screen, you will enable access to all users, even if you are actually deploying to a smaller group.
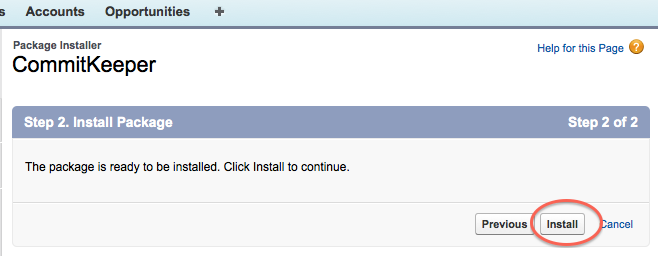
8. Ready to install
If the Salesforce server is busy, you may get a message that you will be notified when the installation has completed. If so, wait a few minutes for the notification and then go to <user name> / App Setup / Installed Packages, and skip to Step 11 below.
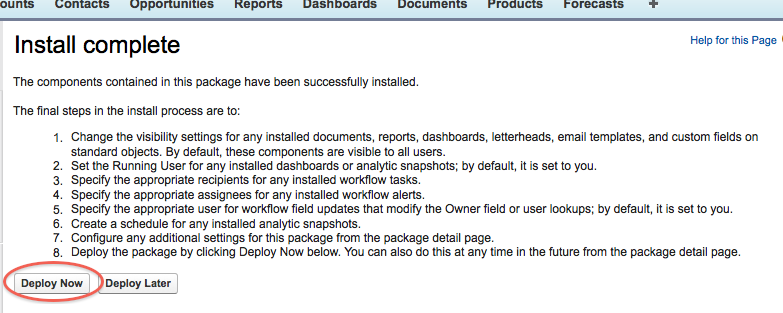
9. After installation, deploy
Once the installation is successful, it’s time to deploy it in your organization. Most of the items listed on this next screen are not relevant to CommitKeeper, so you can simply click Deploy Now.
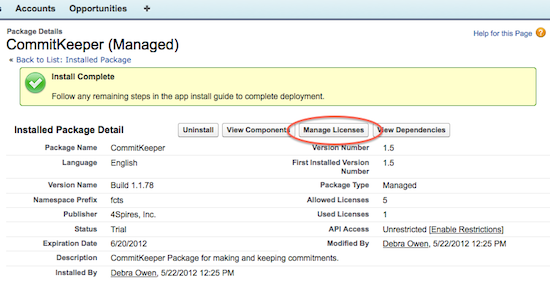
10. The package is now deployed
Now that the package is deployed, click Manage Licenses to assign the available licenses to your teammates for the free 30-day trial.
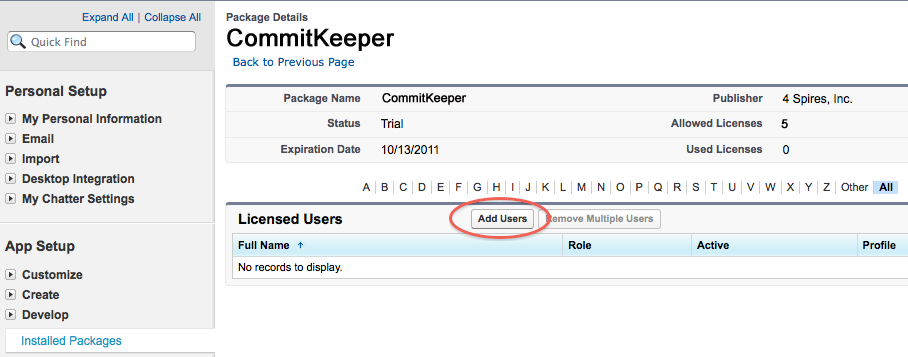
11. Assign licenses to your teammates
On this screen, click Add Users to identify those users in your organization who will try out CommitKeeper.
12. Select the users
Check the boxes to determine who in your organization will be licensed to use CommitKeeper. Be sure to include yourself because later you will be setting preferences in the Admin screen of CommitKeeper.
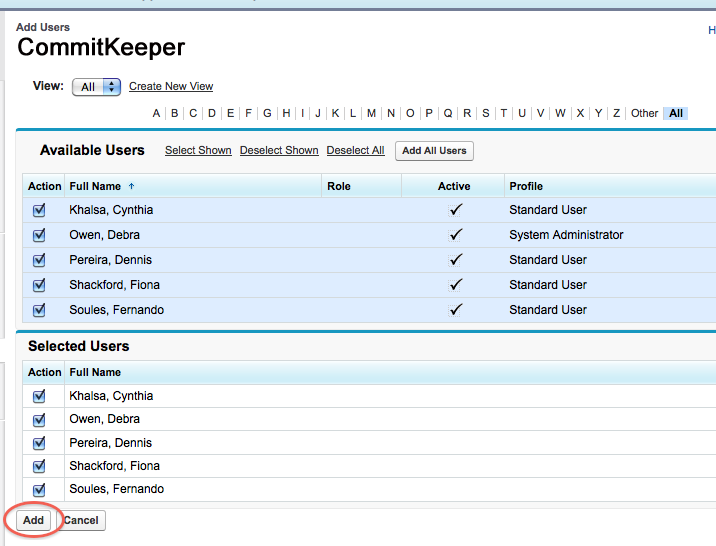
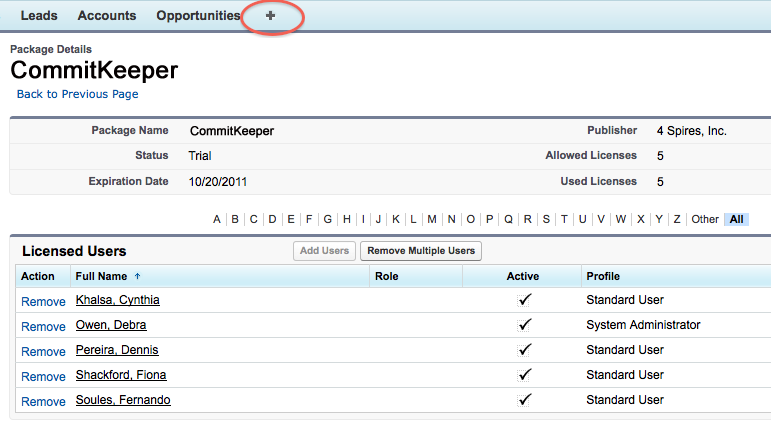
Once you’ve chosen your users, you will see them in the Licensed Users list.
The next step is to configure your tabs, so click the +.
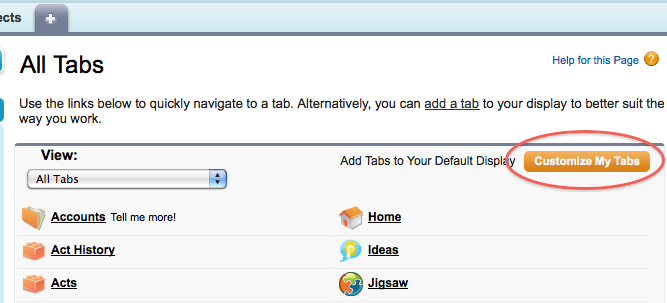
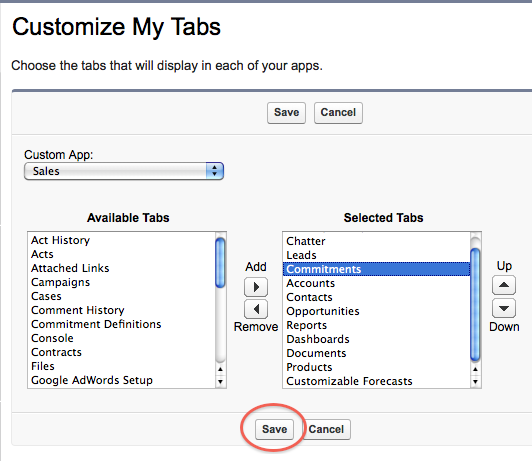
13. Configure your tabs
In the All Tabs screen you will see the CommitKeeper. Click Customize My Tabs.
Configure your tabs
Select Commitments in the left column and click the Add button.
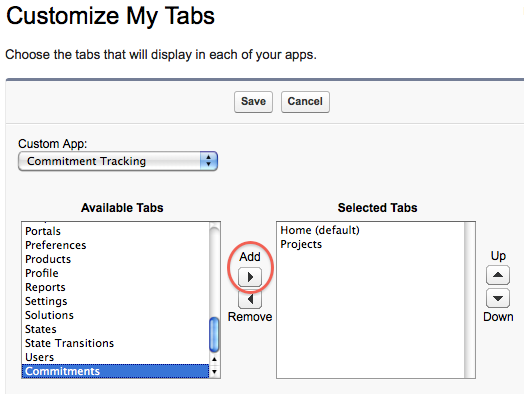
To move Commitments up (thereby moving it to the left in the Tabs bar) click the Up button.
Once you have Commitments positioned where you want it on your Tabs bar, click Save.
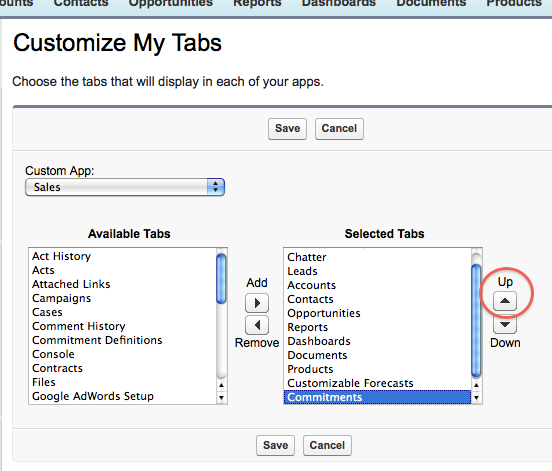
Back on the All Tabs screen, you’ll see Commitments in your Tabs bar. Click the Commitments tab.
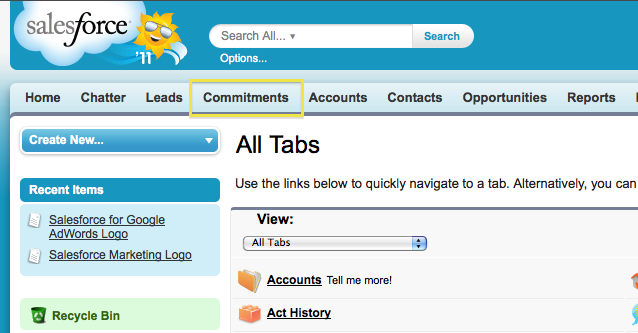
14. Click the Commitments tab and the Finish button.
There is one more configuration step. When you click the Commitments tab, Salesforce will present a Finish button. This completes the installation.

Next you will want to take a few simple steps to deploy CommitKeeper into your organization.
15. Setting up the Related To categories
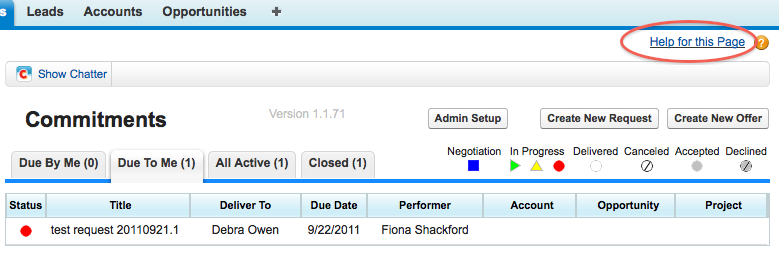
The next screen to appear contains the Commitments list.
Commitments may be “related to” other objects in the Salesforce environment. As the Admin, you determine which three categories may be used in your organization. To do that, click Admin Setup. This button is visible only to those with Administrator privileges.

You can accept the default choices for the Related To categories, or modify them. If you make any changes to the default setup, click Save. The system will return you to the Commitments List.

Note: If you turned off the Enhanced Profile User Interface, you can turn it back on now. Go to <user name> / App Setup / Customize / User Interface and check the Enable Enhanced Profile User Interface checkbox. Click Save.
16. Ready to work!
Thank you for installing CommitKeeper.
To confirm that everything is working correctly, and to introduce your team to CommitKeeper, we recommend that you initiate a new request of everyone on the team to check out the app. The online help page will get you started.
Need further assistance?
Contact
© 2012, 2011 4Spires, Inc. All rights reserved.
CommitKeeper is a trademark of 4Spires, Inc.
Salesforce® is a registered trademark of Salesforce.com, Inc.